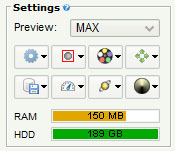
The Settings Panel is used for quick-starting the most important settings directly. Right-click to open a popup menu to choose the desired setting of the related button. The different settings are described below:
General Filters Profiles Shortcuts Log Setttings LogFile AVI AutoRun RingBuffer Telescope Focuser FilterWheel Autoguiding Display Histogram Debayer Hotpixel AutoAlign Derotate PreProcessing Performance Observer SensorTemp Update
General
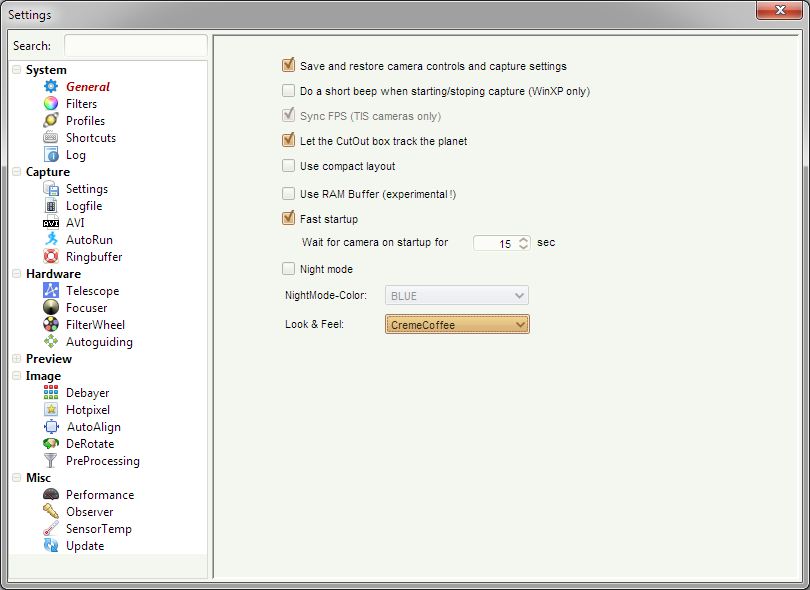
| Save and restore camera controls... |
If checked all camera controls (gain, shutter
etc.) will be saved per profile/filter-channel and restored when
changing the filter/profile. |
| Do a short beep when starting/stoping capture | |
| Display capture-time/countdown/frames... | Displays the capture- or countdown-time togehter with the number of captured frames as big number in the preview window. The countdown-timer is specified by the delay in seconds defined in the Filters or AutoRun settings. |
| Sync FPS |
TIS cameras only: keep the max possible framerate whenever exposure changes |
| Let the CutOut box track the planet |
Track the planet when using the CutOut option |
| Use compact layout |
When checked the data panel will be shown in the vertical options panel resulting in a more compact layout |
| Use RAM Buffer |
EXPERIMENTAL !!! In the previous versions of FireCapture the chances where high for running into an OutOfMemory when data couldn't be written fast enough. Also FireCapture experienced interruptions in such cases when the Java GarbageCollector tried freeing memory. To avoid this you may try enabling this RAM buffer option (will currently only work with AVI, SER and BMP format). With this option enabled FireCapture will pre-allocate the specified RAM size before capture. The number of available frame buffers is displayed in the data details. During capture the frames will be stored in the RAM buffer as long as there are free buffers available. If the buffer is filled capture will pause as long as there are free buffers available again. You can use the "Test" button to check if the given RAM size is ok. Allocating memory may take a while. |
| Fast startup |
Disable all splashscreen gimmick and start as fast as possible |
| Wait for camera on startup |
Wait for the camera with
the given amount of time. Useful if you autostart FireCapture and the
camera takes some time to be ready. |
| NightMode-Color | The background color used in night-mode |
| Look & Feel | You can try different Look&Feels used when night-mode is disabled |
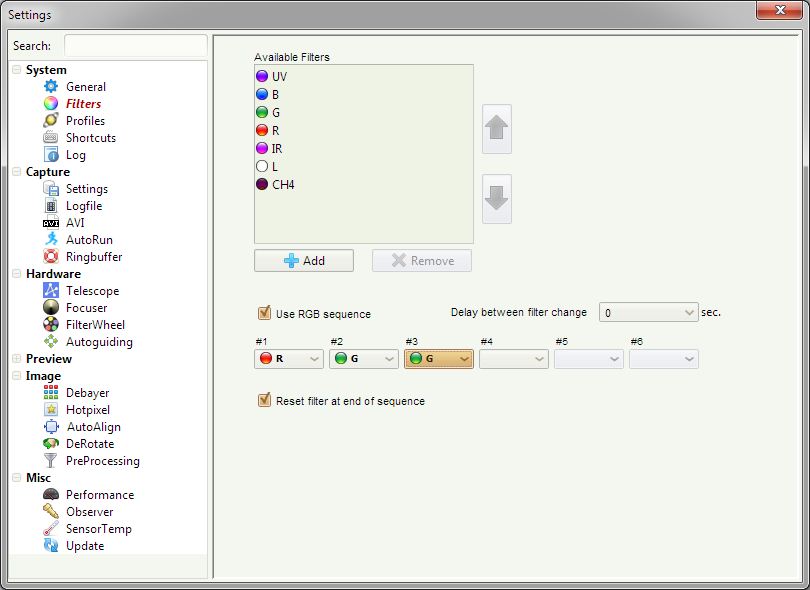
| Available filters |
The available filters that will be shown in the related Capture panel. Use the buttons "Add/Remove" to change. |
|
Use RGB sequence |
When checked the filter drop-down boxes below gets activated and you can set an arbitrary sequence of filters as RGB sequence. This means whenever you have finished a capture for a filter that is included in this sequence FireCapture will automatically switch to the next filter in that sequence. |
| Delay between filter change | If
set FireCapture will automatically start the capture for the next
filter in the sequence after the specified delay in seconds. This is useful when using a motorized filterwheel. |
| Reset filter at end of sequence | Switch back to the first filter of the sequence when a sequence has ended |
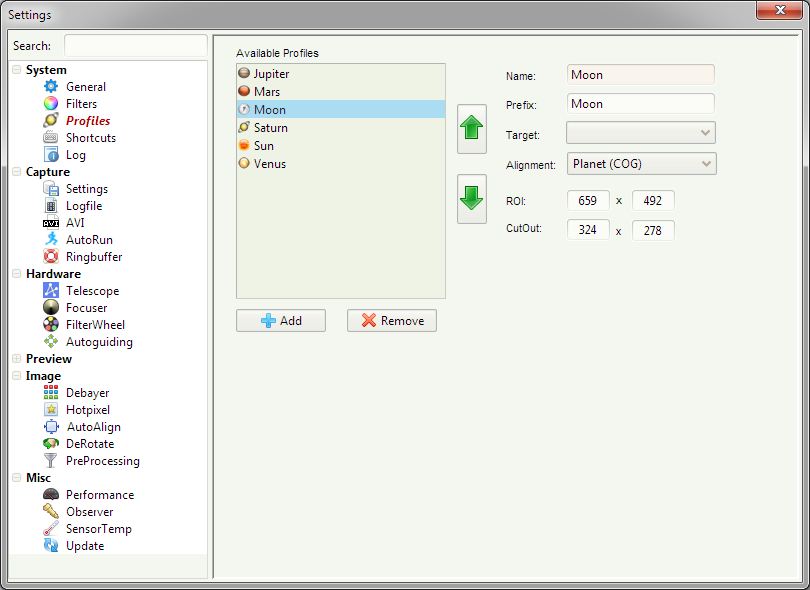
| Available profiles |
Using the "Add" or "Remove" buttons you can change the available profiles that will be shown in the profiles drop-down box (see: Capture). |
|
Name / Prefix / Target etc. |
The name is the filename of the profile and the prefix will be used in the filename of your capture files. Select a planet as target for this profile which will used to calculate the ephemerides when showing the object details. The ROI defines the image size of the camera when selecting this profile. The CutOut will define the cutout region when using the CutOut option. |
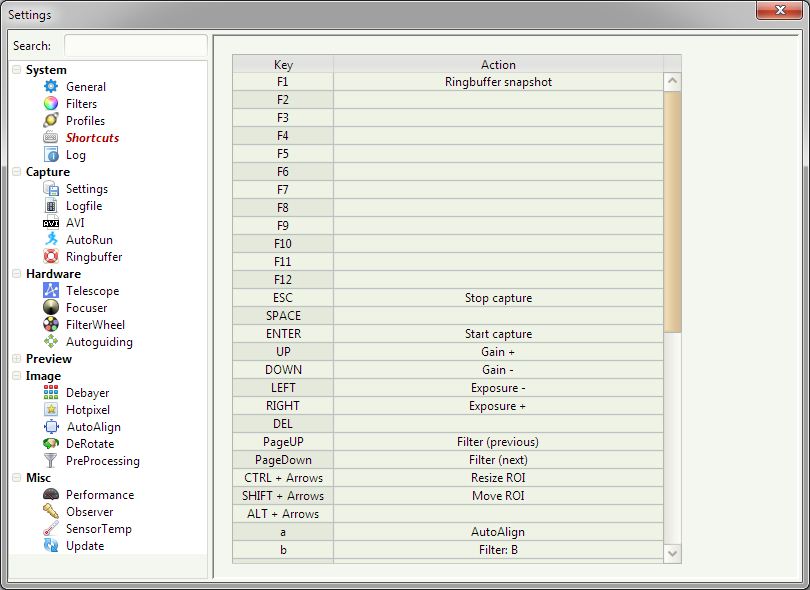
| Key / Action |
Double click into the action field to select an action you want to assign to the given key. |

| Log |
This tab shows the FireCapture log file. Whenever you contacting me because of errors or problems please attach this outout (or the related "log.txt" in the FireCapture main folder) |

| Capture root directory |
The root directory where the captured files will be stored to. Use the button "..." to select. |
|
Current filename |
Preview of how the filename would be look like depending on the selected filename properties |
| Filename properties |
Various properties used as part of the filename |
| Date/Time format | The format to display dates and times. |
| Capture counter | When using the capture
counter in the filename properties the related counter will be count up
automatically with every new capture. You can change that value here. |
| Auto-create subfolders | Automatically
creates a subfolder structure for the captured files. As name of the
subfolders the selected properties (object, RGB counter etc.) will be
used. |
| Write session logfiles |
Write an additional logfile with all capture details for every captured file. |
| Print timestamp into data | Print a timestamp with milliseconds accuracy directly into the captured data. This is useful whenever you need to know the exact time each frame (e.g. occultation data). |
| Zip captured files |
If enabled all capture files (except AVI and
SER) will directly written into a ZIP file. |
| Save first AVI/SER frame as JPG preview |
Write the first frame of the captured AVI or SER file as JPG-File. |
| Scale SER data to 16bit (AviStack) | Only available for Basler cameras ! Its recommended to enable this option when capturing 16bit data for proper display in AviStack. |

| Write session logfiles |
Create a logfile (*.log) for every capture file |
|
Logfile content |
Select the logfile content |
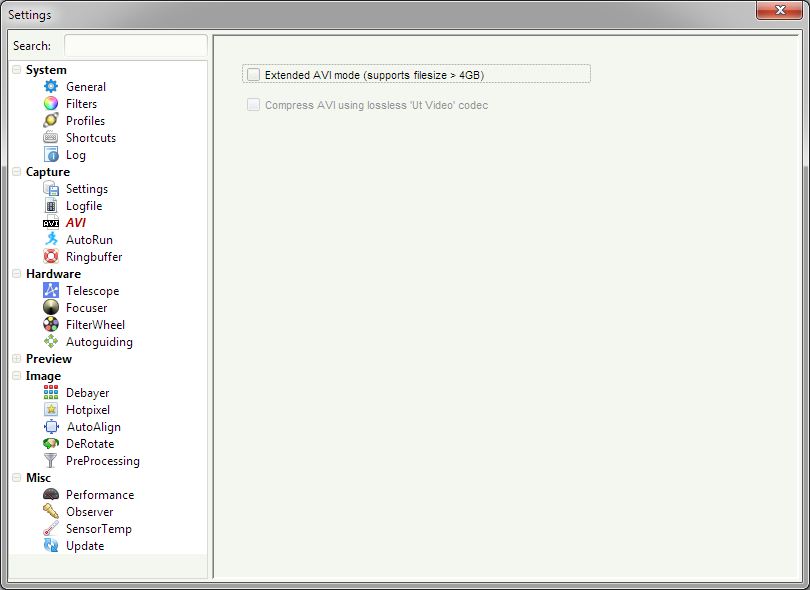
| Extended AVI mode |
Support AVIs with size > 4GB (recommended !) |
|
Compress AVI |
Enable lossless compression using UT video codes. |
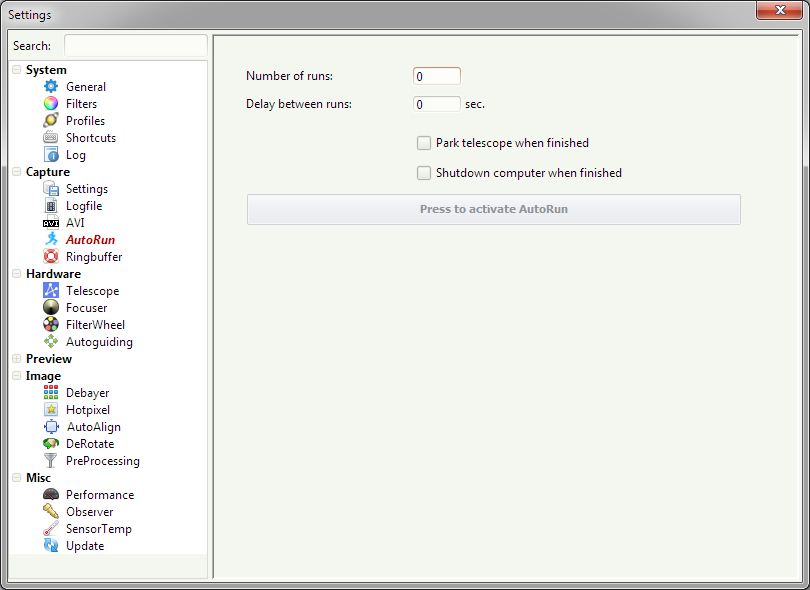
| Number of runs |
The
number of runs you want to capture. When running no RGB sequence this
will be the same as the number of captured files. Having the RGB
sequence enabled this will be the number of full RGB series that will
be captured. In order to use the AutoRun function you need to set a limit in advance for your current filter channel (or for every filter of an RGB sequence if used). If you don't have a warning will be shown below. |
| Delay between runs |
Delay in seconds between each run for that the capture will be paused. |
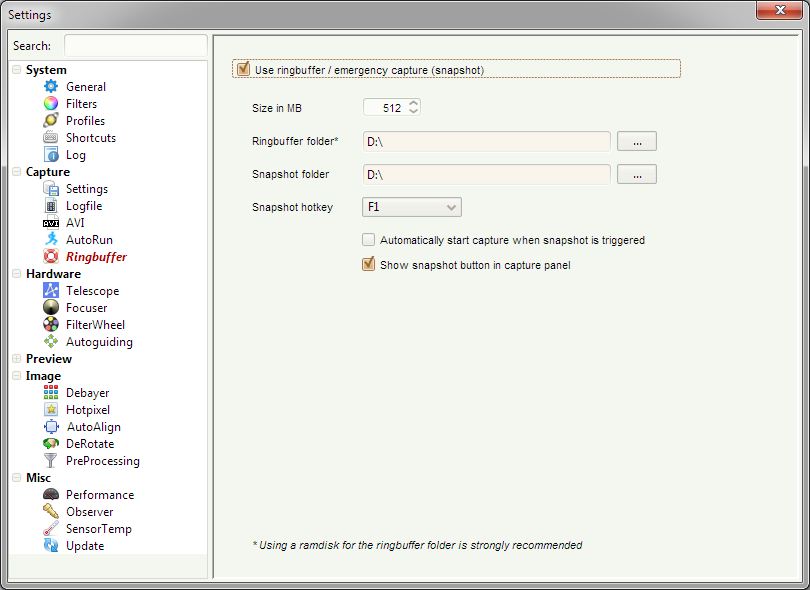
| Use ringbuffer |
Enable
ringbuffer / emergancy snapshot feature. When no capture is running
this will keep the last N frames in a ringbuffer file. Whenever
something interesting happens a snapshot can be triggered using the
specified hotkey. This will copy the ringbuffer to a SER or AVI file.
If the "Show snapshot button..." option is enabled you can use the
related button in the UI as well to trigger a snapshot. |
| Ringbuffer folder |
Define the folder that keeps the ringbuffer. It's strongly recommend using a virtual ramdisk drive for this. |
| Snapshot folder | Target folder for the SER/AVI snapshot file |
| Automtically start capture... |
Enable if you want to start a capture whenever a snapshot is triggered. This ensures not missing any data. |
| Show snapshot button... |
Shows an additional button left beside the capture button that triggers a snapshot. |
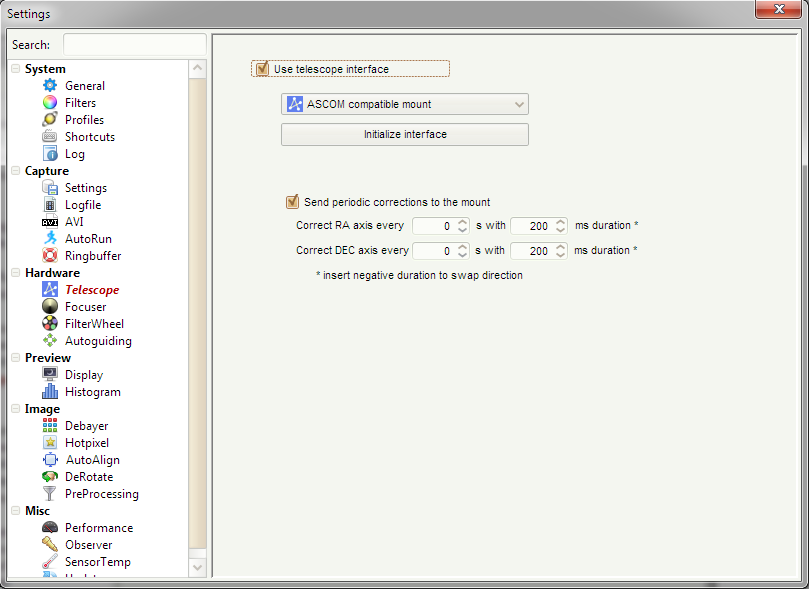
| Use telescope interface |
Will
enable the telescope interface in FireCapture. Supported interfaces: - ASCOM - Cookbook CCD serial interface (by Richard Berry) - Camera-internal ST4 port (e.g. ASI120 ore QHY5L-II) - Shoestring GPUSB |
|
Initialize Autoguider interface |
Press this button to initialize the interface. When using an ASCOM interface the ASCOM telescope chooser dialog will show up and you need to pick your interface. |
| Send periodic corrections... |
If your mount doesn't track accurate you can enabled send periodic corrections with the given RA/DEC parameters |
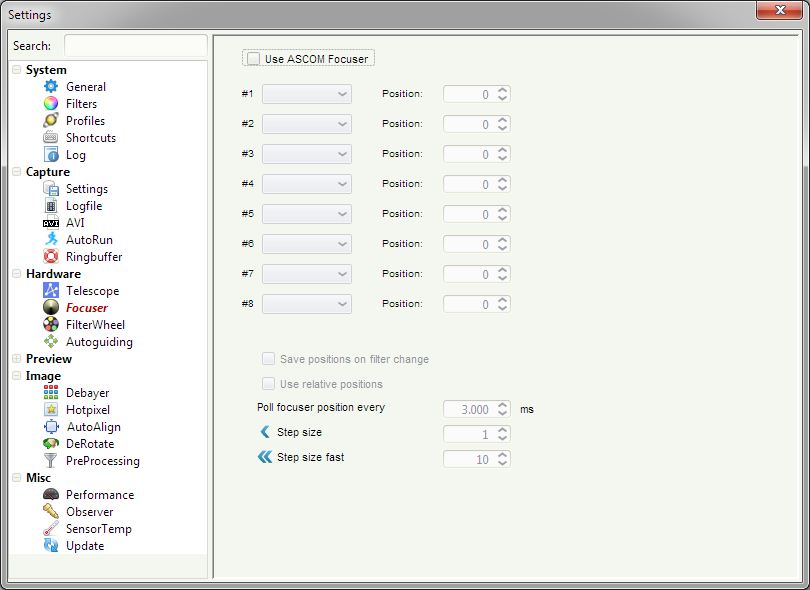
| Use ASCOM Focuser |
Select to choose and initialize an ASCOM focuser. Set the desired position (absolute or relative) for every filter. |
|
Save positions on filter change |
When checked the focuser position will be stored for the current filter whenever the filter changes. |
| Use relative positions | use relative psoitions instead of absolute. Only available for absolute focusers. |
| Poll focuser position | Specify the time in ms for which the focuser position shown in the focuser panel will be updated. |
| Step size | Step size for the manual in/out focuser buttons in the focuser panel. |
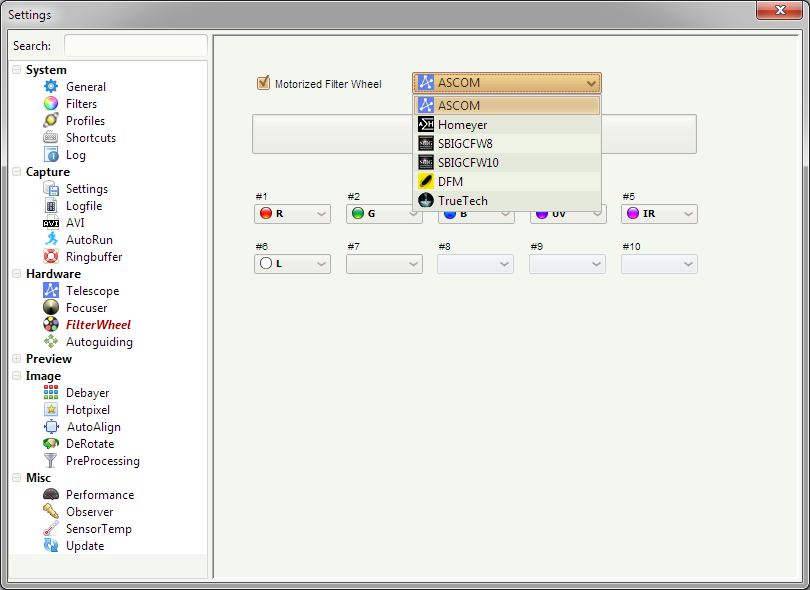
| Motorized Filter Wheel | If
you have a motorized filterwheel you can check this and FireCapture
will command your filterwheel whenever the related filter in the Capture
panel changes. You need to set the correct filter positions using
the drop-down boxes !! After selecting your interface press the "Initialize filterwheel" button. When using an ASCOM filterwheel you need to select the proper interface from the ASCOM filterwheel chooser that will be shown than. FireCapture currently supports the following filterwheel interfaces: - ASCOM - Homeyer - SBig CFW8 (hasn't been tested yet) - SBig CFW10 - DFM - TrueTech |
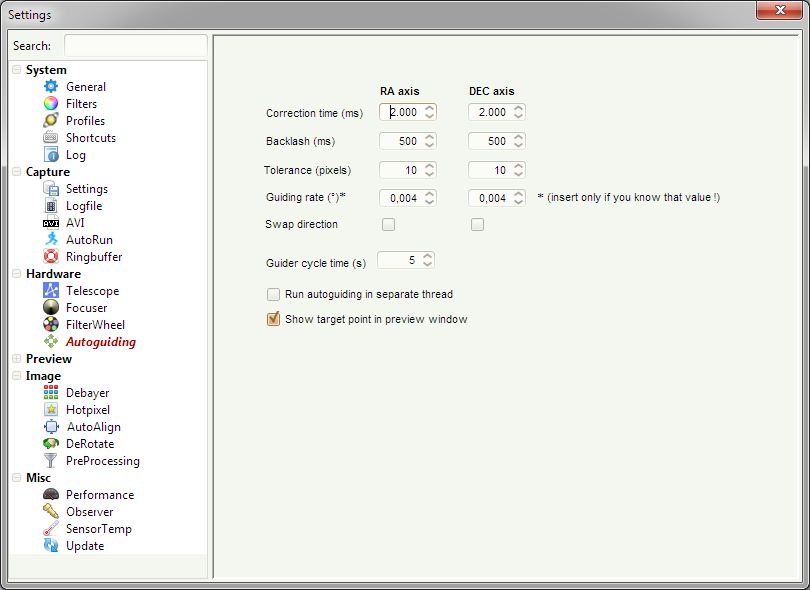
| Correction time (ms) |
Duration in ms that will be used to fire a single correction to the given axis. |
| Backlash (ms) | Duration in ms that will be used as backlash and added to the correction time whenever the direction of an axis changes. |
| Tolerance (pixels) |
When you enable Autoguiding in the Options
FireCapture will track the object based on it's x/y offset to the
center. Only if the off-center error is greater than the tolerance
value the autoguider gets activated. |
| Guiding rate (°) | Only used when your ASCOM interface supports MoveAxis mode. Value must be > 0 than. |
| Swap direction |
Flips RA or DEC axis |
| Guider cycle time (s) | Repetition rate in seconds of the autoguider in which it checks for corrections. If you have a good mount you can increase this value. |
| Run autoguiding in separate thread |
Ensures that there are no delays in the UI whenever autoguiding trigger corrections |
| Show target point... |
Shows a red '+' in the preview indicating the target point of the autoguiding |
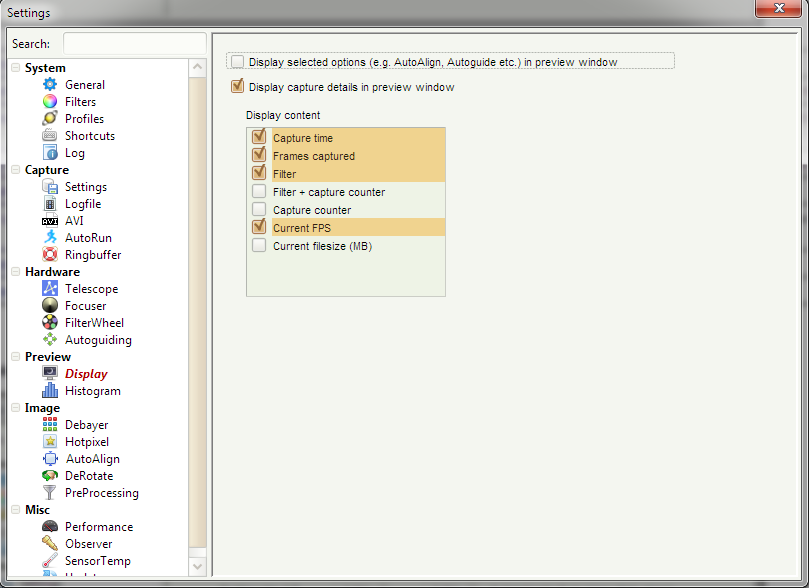
| Display selected options... |
When enabled the most important options will be shown top-left in the preview window when slelected. |
| Display capture details... | Displays
some capture details as big text top-left in the preview window
whenever a capture is running. You may configure the content from the
list below. |

| Show histogram in separate window |
Don't need to explain this one ;-) |
|
Show 'Emil Kraaikamp Noise Estimator' |
Calculate and show the standard deviation noise value. Based on Emil's research here the number gives an indication if it's useful to switch to 12-bit recordings instead of 8-bit. If this value is below 2 it turns red and indicates it might be better off switching to 16-bit mode. |
| Hide histrogram when capture starts |
Don't need to explain this one ;-) |
| Show histrogram when capture stops | Don't need to explain this one ;-) |
| Histogram style |
Use the style of the displayed histogram as either full log scale or small bar in the buttom of the preview window. |
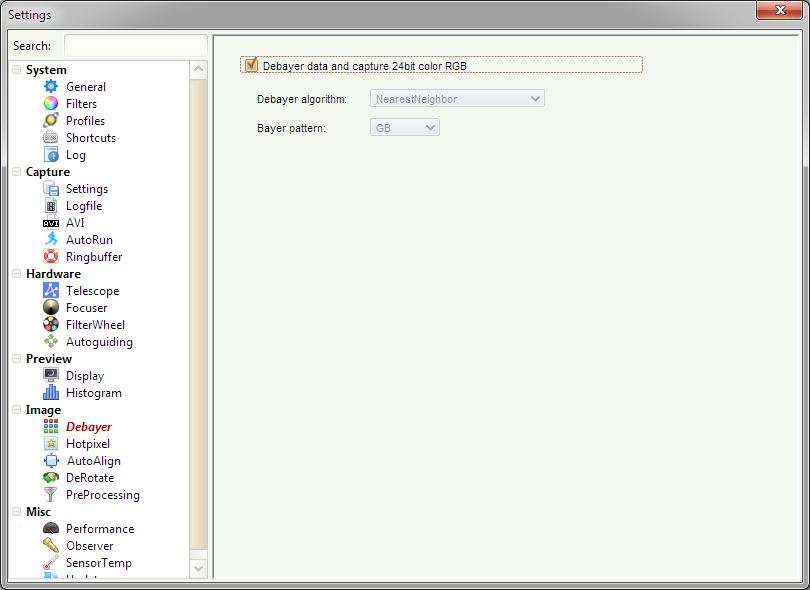
| Debayer data and capture 24bit color RGB |
Only available for color cameras ! If checked the incomming frames will be debayered in real-time using the selected debayer algorithm and bayer pattern. This may be useful only on very fast machines. Capturing having this option checked will store RGB (24bit) color data. If you unselect this option your data will be stored as raw undebayered Y800 data and you can debayer the data using the standalone Debayer-Tool afterwards. |
| Debayer algorithm |
The algorithm used for debayering your data. |
| Bayer pattern | The bayer pattern of your sensor. See your camera spec for details. |

| Enable hotpixel correction |
With this option you can correct hotpixels by interpolating
neighbouring pixel data. Even a single hotpixels doesn't hurt much its annoying because it can
disturb the histogram. |
| Start hotpixel detection |
Click to run the automatic hotpixel detection.
Setup gain/exposure so that all hotpixels are visible but the
background is still black. Change the treshold slider in the hotpixel
wizard until all hotpixels disapear. Press ok when done. |
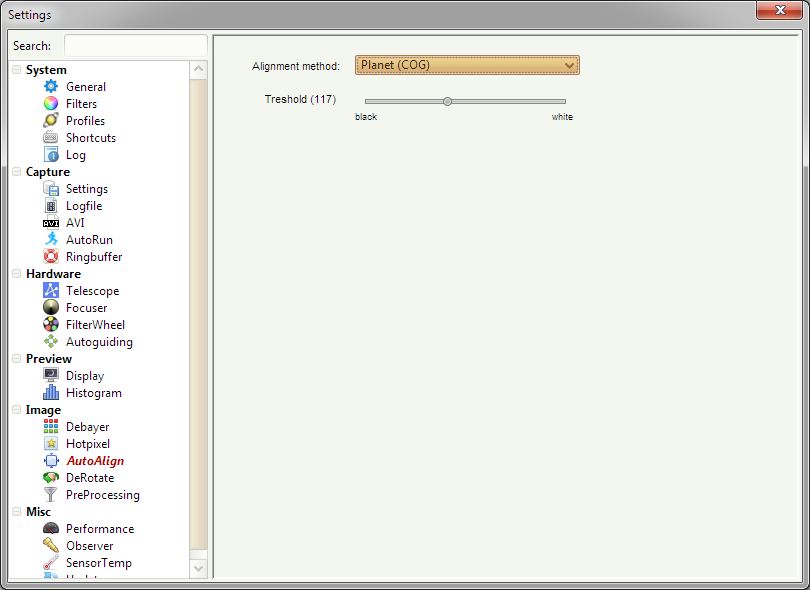
| Alignment method |
For special tasks (e.g. AutoAlign, Autoguiding, Quality-Estimation) FireCapture uses a real-time blob detection algorithm that will be used to centre the object. The fasted and most recommended method is "Planets (COB)" which is the default setting for Planets. |
|
Alignment tuning (Treshold, Width, Height etc.) |
Even
if the default values should be work fine you may use these values for
fine tuning the alignment box. On Planets the alignment box should
enclose the
whole disk of the Planet. Change the treshold slider as long as the box
is big enough. On large Planets like Jupiter you may need to increase
the max width & height as well. Simple click "Done" when finished
and the Auto-Align function should work properly on Planets.
FireCapture will store the treshold value in the profile so you
need to setup this only once. For reducing CPU load and getting higher framerates when using auto-align you can increase the "Alignment boost" value (see: "Performance" below). On non-spheric object like the Moon setting up the alignment tuning is much more difficult. Because of the changing seeing conditions the blob may gets lost through phases with lower image contrast. So you must play with the min width/height and border distance sliders in order to find a blob which will be reproducible detectable on the same surface detail. Despite I'm able to get this working on the moon in most cases I don't recommend to use this currently ! |
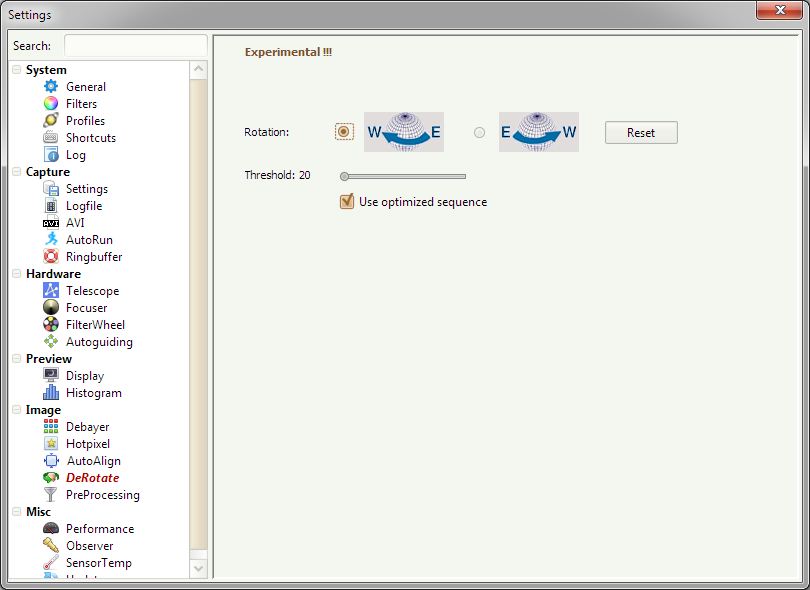
| Derotate |
EXPERIMENTAL ! This has been my playground long before WinJUPOS introduced a derotation function so consider all this as higly experimental. To use this function align the planet with North or South at the top of the camera. Depending on this you need to select the correct rotation. Make sure that Jupiter is set as planet for your current profile otherwise the derotate option stays disabled. |
| Rotation |
If Jupiter rotates right-to-left in your image select the W<-E rotation icon and FireCapture will derotate the images from left-to-right. |
| Use optimized sequence | If you have preset a fixed time limit for all channels in your RGB sequence you could enable the "use optimized sequence" option where it will set the derotation 0-point just into the middle of your RGB sequence. |
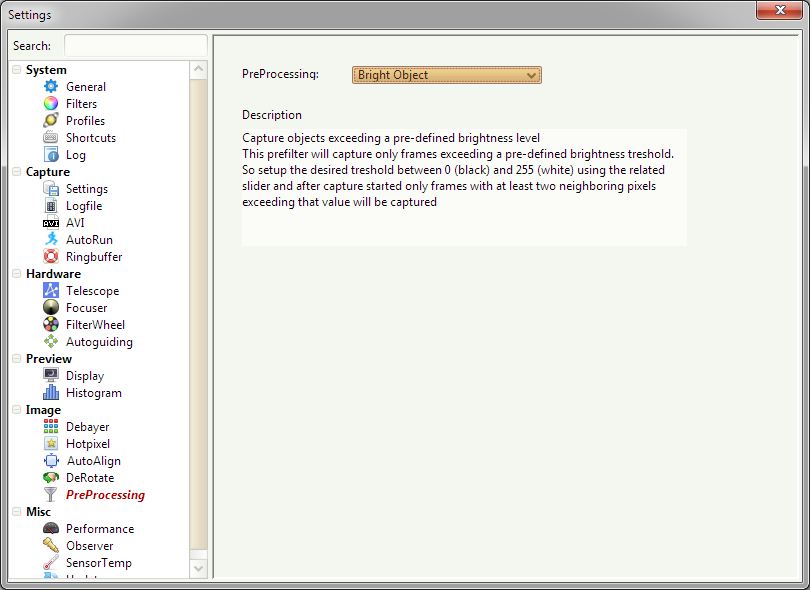
| PreProcessing |
This is just the same drop-down box as the one shown in the Options pane. See PreProcessing for a detailed description of the available pre-processing functions. |
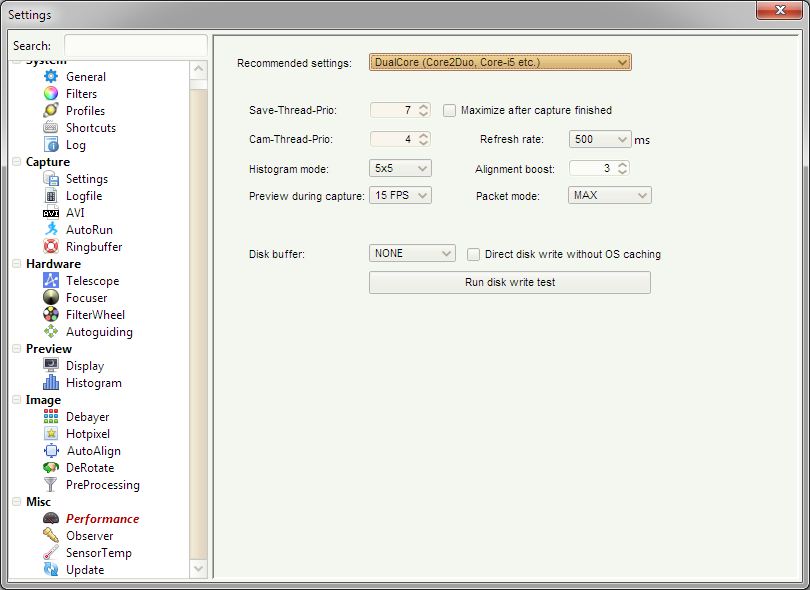
| Recommended settings |
A lot of time has been invested into squeezing out the best performance the underlying Java architecture allows. The performance tab is used to setup the various values related to this. It's recommended to use the recommended settings based on how fast your computer is. |
|
Save/Cam Thread-Prio |
Reading frames from the camera and saving them to disk runs in different threads in FireCapture. Here you can specify the related priority of the threads which may be useful on slower machines for fine-tuning. |
| Refresh rate (ms) |
The refresh rate in which the data details (fps, saved count etc.) will be updated.This has been identified as one of the major reason for higher CPU load when previewing at high framerates. So on slower machine set the refresh rate to a higher value. |
| Histogram mode | Histogram
calculation mode when displaying the histogram. For reducing CPU load you can choose a higher
calculation mode. 3x3 just means that only every 3rd image row/column
is used for histogram calculation. |
| Alignment boost |
Similar to histogram mode but used for the AutoAlign blob detection algorithm. |
| Boost while capturing | You can set a higher Boost accelerator value during capture. This may result in a higher framerate. |
| Packet mode |
Only available for Point Grey cameras ! I recommend not touching this ;-) |
| Disk buffer / Direct disk write | On
some machines using a disk buffer or enabling direct disk writing may
achieve a higher transfer rate. You can test this by pressing the "Test
optimal disk buffer" button which will run a bechmark test using
various settings. This will take few minutes and based on the results
you can enable these options or not. Leave the default settings if you're not sure. |
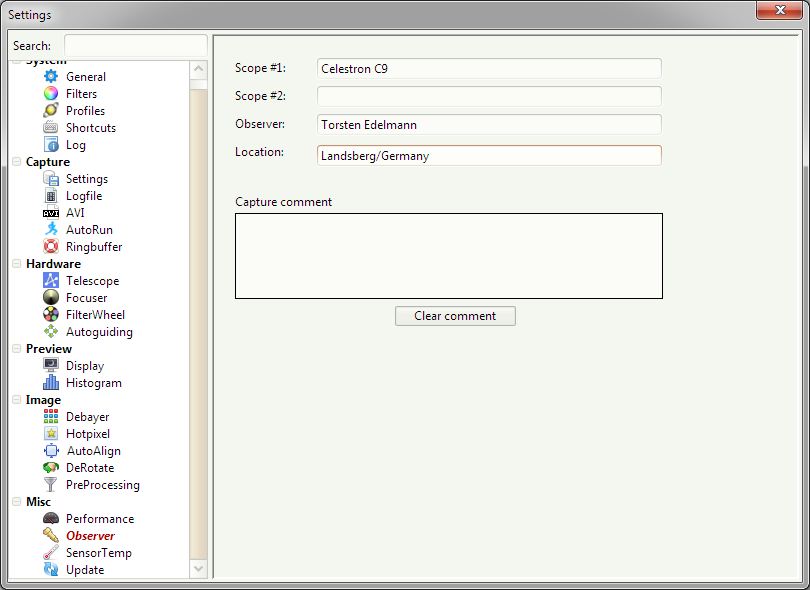
| Scope / Observer / Location |
Insert your observer details her. These values will be used in the ImageMagic tool (see: SessionBrowser) |
| Capture comment | You may insert an optional comment that will be stored in the session details. |
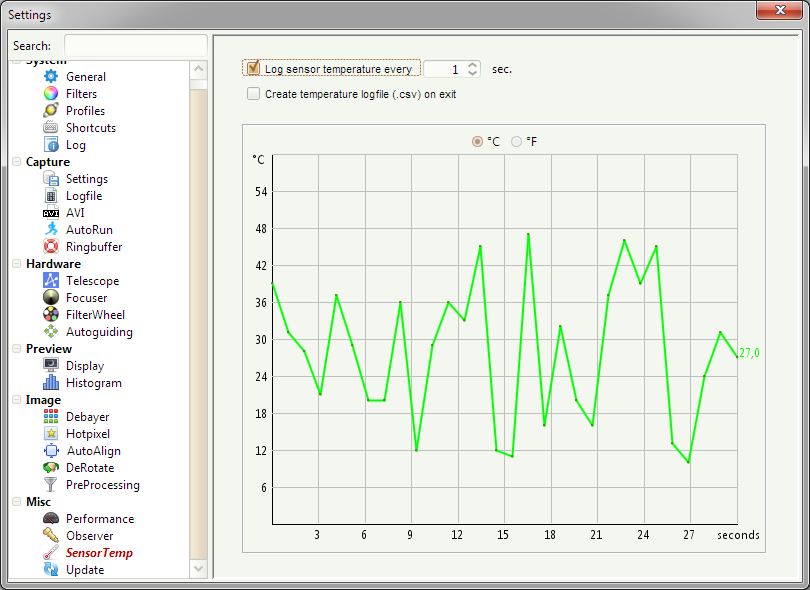
| Log sensor temperature |
Enables
sensor temperature logging is supported by the camera. This will update
the temp in the preview window based on the given intervall. |
| Create temperature logfile |
Writes a csv file with the temperature data when closing FireCapture. |
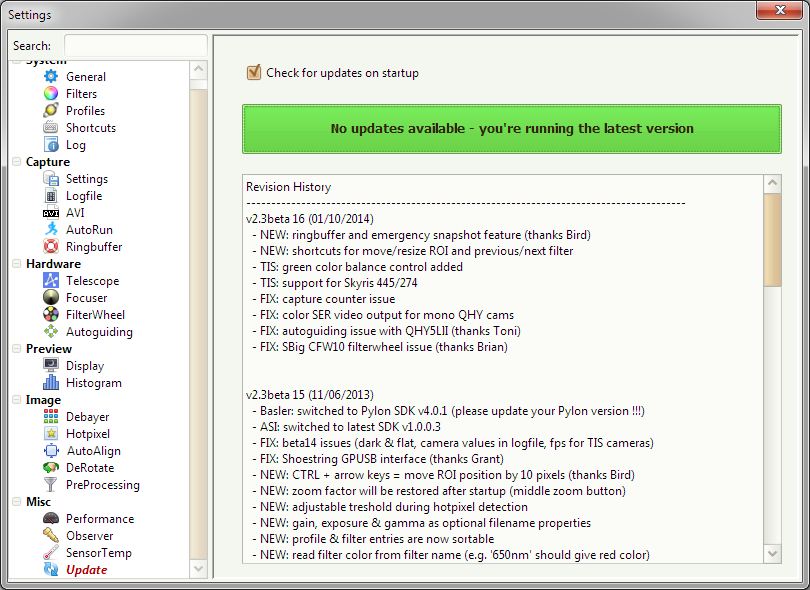
| Press the button to check for online updates. You need to restart FireCapture to takes changes effect after updating. |

